Pages

Sunday, November 30, 2014

One Year In Our Home

Wow today has been 1 year in our home. We moved in on 30th November '13.... 2 days before our other house settled. Perfect timing but also a mad rush as Julian flew back to work that same day. Which left me to unpack the entire house with 2 kids. Not something i'd ever want to do again!

Most our spare time and money this year has gone into making our house a home. A home that we love and have such pride in. Our focus for the next year is to get the back garden and parent retreat finished. We have great plans... but expensive taste. Since we plan to be here 'forever' we refuse to let go of our ideas and will make them happen, no matter how long it takes. Hence why we have had a giant 'sandpit' for this past year.

Julian's current project is building our built in BBQ and wood fired pizza oven area in the alfresco. Next we will be getting some plans into council for a pergola over the sand pit area. Then its time to deck! We will add outdoor lounges to this space.. somewhere to relax in the shade on a nice sunny day. There are also plans for a large water feature and rocky creek. I look forward to sharing more of our home with you as these projects happen.

If you havent seen inside our home there are a list on links for each room in the 'Floor Plan' tab above!

Saturday, November 29, 2014

Christmas Card Displays

Christmas cards arent as common these days with so much being online. I still like to send family a photo Christmas card. I usually add a magnet strip to the back to it's easily put on the fridge. However if you are like myself and you don't like anything on your fridge you may look for other ways to display your cards. Here are some creative ideas you can make and bring out when you decorate the house and/or put up your Christmas tree.

1) Peg & Ribbon Garland - Simple choose some ribbon, hang and attach cards with pegs. These pegs have been decorated for a Christmas look.


2) Simple Washi Tape Tree - Use Washi tape to create the shape of a Christmas tree. Add cards using stickers or more washi tape.


3) Tree Arrangement - Arrange Christmas cards in the shape of a tree on the wall.

4) Framed Cards - Use an old large frame... attach string/ribbon/lights then use mini pegs to attach the cards. I'm loving this ideas as its easy to bring out at Christmas time but could also be used at birthdays too.

5) Present Door - Attach ribbon to the door to look like a present. Then attach cards along the ribbon. Ideally use a door that remains closed in the day.

6) Trellis Tree - Use a tomato trellis, cover top in cardboard and create a base. Use clips or pegs attach the cards the the exposed wire.

7) Fancy Washi Tape Tree - This one has used wape tape to attach string/wire to the wall which you can then clip/peg cards too. There is added tinsel and pot. Click to be taken to see a closer photo.

** Click images to be taken to the original source.

I think im going to make something i use bring out with the Christmas decorations each year and add any cards i may receive to it. Otherwise i may use the new ledges in the kids activity room.

How do you display your Christmas Cards??

Friday, November 28, 2014

Recipe: Slow Cooker Satay Chicken


Slow cooker meals are more commonly known as winter food. However i think slow cookers are great in summer... no standing at a hot stove or turning on the oven which can heat the house. This satay chicken is lovely served with steamed vegetables.


SLOW COOKER SATAY CHICKEN

Serves 4

INGREDIENTS:
400g Chicken Breast - diced
70g Mushroom - sliced
1 Red Capsicum
2 Large Carrots
1 270ml can Coconut Cream
3 TBS Peanut Butter
3 TBS Tomato Paste
3 TBS  Sweet Chilli Sauce
2 tsp Garlic - minced (or 2 cloves)
Broccoli (optional)

METHOD:
1) Chop carrot and capsicum and place in the bottom of your slow cooker. Add mushroom and chicken breast.
2) Add all other ingredients and mix together until combined.
3) Turn the heat to high and cover with lid for 4 hours. Stir every hour
4) At 4 hours turn the heat to low and remove lid whilst vegetables are steaming. This allows the satay chicken to thicken. Usually 10-20 minutes.
5) Serve with vegetables and enjoy!


To save this recipe for later click the title then pin this image


Thursday, November 27, 2014

Organise: Study Drawers

 The other weekend i showed you my newly made over study (click image to see more). 
I mentioned at the end of the post how i needed to sort out the drawers. The drawers haven't not been tidied since the study was installed at the start of the year. With the kids going through them this became my hidden messy zone. You know those spots that are hidden so you just let it get a little crazy.

I don't really use these drawers often as most the items i use are up on the shelves but knowing how messy they are were starting to get to me so yesterday i got out some of my trusty Kmart baskets and gave them a tidy.

I managed to clear out rubbish/packaging or things that did no belong in there. BEFORE on the left and AFTER on the right
Have you got a messy hidden spot in your house? Where is it? 

Wednesday, November 26, 2014

Colour Pop: Grey

Grey is a fantastic base colour.. it popularity has increased over the last few years with many choosing the paint their walls grey, buy grey furniture and decor items. Grey works well teamed with warm or cool colours. I particularly love grey with greens, blues and yellow. 

a) Kmart - Wire Storage Basket
b) Adairs - Matilda Knitted Throw
c) Kmart - Striped Storage Basket
d) Target - Picardy Knitted Cushion
e) Ikea - Scented Candle
f) Target - Brooklyn Pillar Stand
g) Freedom - Danish Wing Chair
h) Freedom - Diagonal Mug
i) Uashmama - Grey Paper Bag
j) Spotlight - Tealight Vase
k) Target - Royal Vase
l) Country Road - Maison Placemat
m) Domayne - Lace Lidded Bowl
n) Myer - Jayson Bowl
o) Masters - Mileno Soap Dispenser
p) Adairs - Lucca Towel
q) Adairs - Malmo Geo Towel
r) Myers - Basalt Drum Stool
s) Adairs - Majestic Ottoman
t) Target - Vintage Peg Tin
u) Domayne - Studio Canister Set
v) KitchenAid - Liquid Graphite

Tuesday, November 25, 2014

Clever Cookie Gift


A couple of weeks ago i posted my Smart Teacher Gift. This gift had a wonderful response as it's crafty and affordable. Today i have another gift idea for teachers, tutors, mentors, carers or anyone who has helped you learn and become a clever cookie.

WHAT YOU NEED:
Cookies (bake yourself or purchase some, bakery style ones are best)
Cellophane bags'
Ribbon
Lime & Mortar Cookie Tag

INSTRUCTION:
1) Print Cookie Tags, cut them out and use hole punch to put a hole in the top.
2) Bake cookies and let them cool completely.
3) Place 2 cookies (or more if you would like) into a cellophane bag
4) Tie ribbon and tag onto the cellophane bag.

It's that simple! This one is even more cost effective and would cost under $2!

Click the Cookie Tag, right click and save. Insert into a word document and resize to what you would like yours to be (mine are 6cm). Copy it as many times as you need on the page then print onto thick paper/card. I've done it this way as the amount each family will need varies.


For the teachers/carers I've made a label for you too. Giving a cookie to your students would be a cute end of year present or anytime treat/prize.


*** FOR PERSONAL USE ONLY

Monday, November 24, 2014

Christmas Guide: Teen Girl

It has been a long time since i was a teenager but I've chosen from gifts i would buy a teenage girl. These gifts are suitable from tween to teen. Team a few of these gifts together for one fantastic gift!


a) Adairs - Ice Cream Pencil Case
b) Kikki K - Savings Box
c) Myer - Chi Chi Manicure Set
d) The Body Shop - Strawberry Scoop
e) Adairs - Ice Cream Towel
f) Typo - Light Box
g) Target - Fujifilm Instax Camera
h) Myer - Miranda Cosmetic Case
i) Target - Coloured Pencils
j) Forever New - Cupcake Lip Balms
k) Kikki K - Lockable Journal
l) The Body Shop - Lippy Mini Case
m) Zilvi - Pastel Arrow Set
n) The Body Shop - Melonberry Purse
o) Target - Wire Word
p) Myer - Sonny Angels - For more ranges see Lime Tree Kids or Little Lola Boutique

Sunday, November 23, 2014

Kids Parties: Pink Party

Coloured parties are an easy go to theme if you have no idea what you'd like to do or your kid doesn't have a preference. This is Bec's daughter's 1st birthday. As you can tell by now over last few weeks Bec loves planning her kids birthday parties and all the details as much as i do.

Get prepared for the best pink party eye candy you've seen!


The party food


Cupcake party favours and drink station


Mini lolly buffet

The pretty pink ombre cake made by Let Them Eat Cake WA


Such a cute idea - Using stickers displaying each month and a white bodysuit with same background you can create a timeline of how your little one has grown


See more of Bec's parties: Disney Planes and Giggle & Hoot

Saturday, November 22, 2014

Creative Gift Wrapping Ideas


I really enjoy wrapping presents. There is something about it i find relaxing. Perhaps it's because its another creative outlet and it's pretty. I love seeing all the amazing ways people wrap gifts. For my own kids i don't do anything too fancy. But i like to make an effort when the gifts are for others.

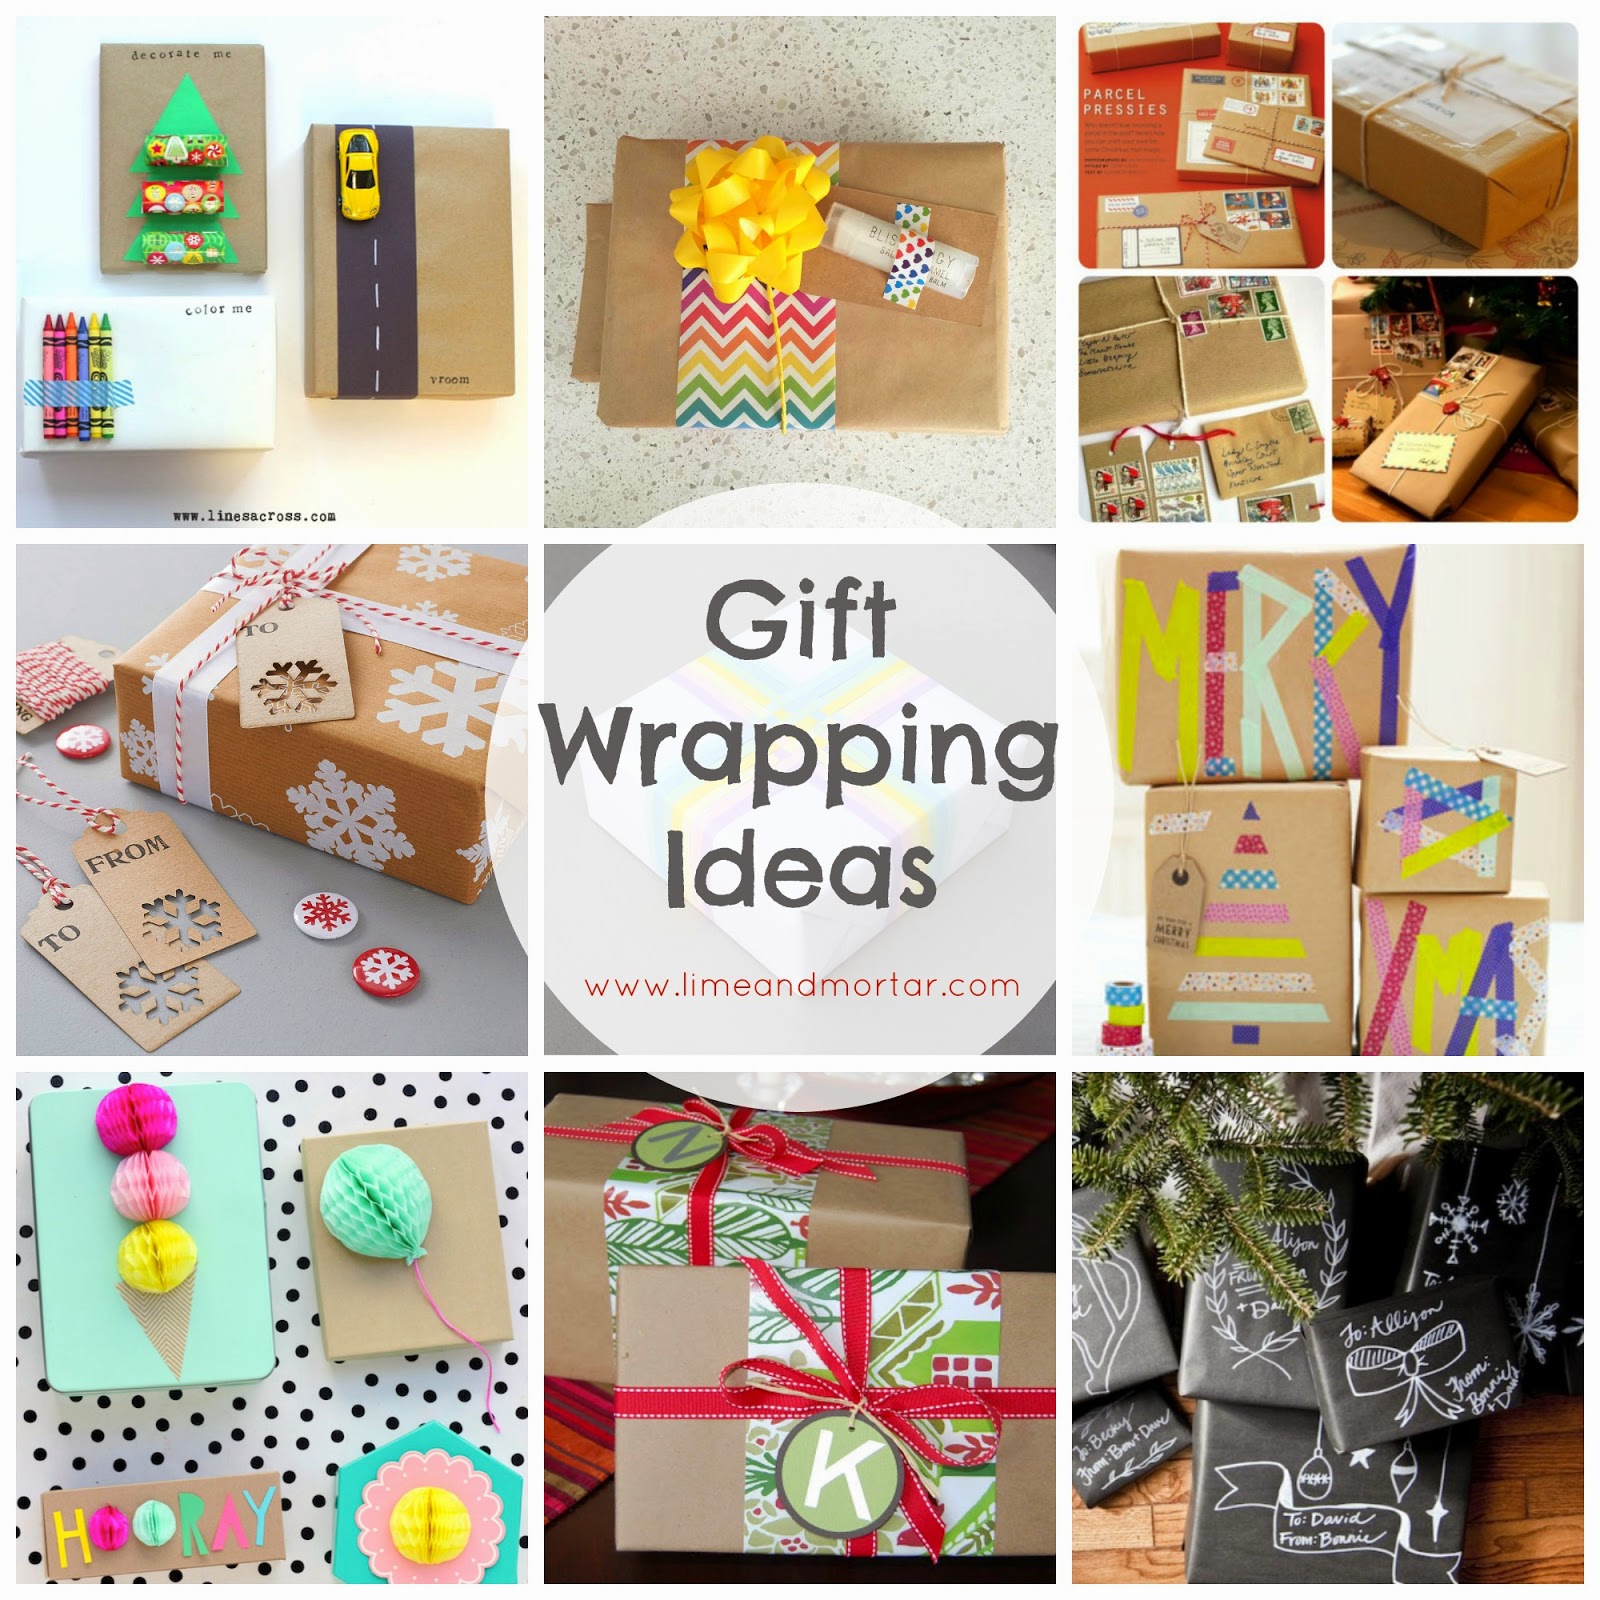
Here are some great ways to wrap your presents this Christmas. Whilst some of these examples are not Christmas focused you can easily use the ideas in Christmas theme and/or colours.

Click images to go to the source which will feature more photos and/or instructions.

1. Chalkboard Look. Use black craft paper and a white chalk marker.

2. Colour Strip + Ribbon. I do this style often. Use craft paper, strip of coloured wrapping paper and ribbon. It's simple but it looks fancy.

3. Parcel Present. Adding stamps, address, airmail stickers to brown craft paper is a fantastic idea. Who doesn't love receiving a parcel!

4. Stamped Craft Paper. Paint/stamp images onto brown craft paper. This is a fun one you could even get the kids to do. Otherwise there are shops selling printed brown craft wrapping paper.

5. Washi Tape Decoration. Using washi tape make words or images on your wrapping paper.
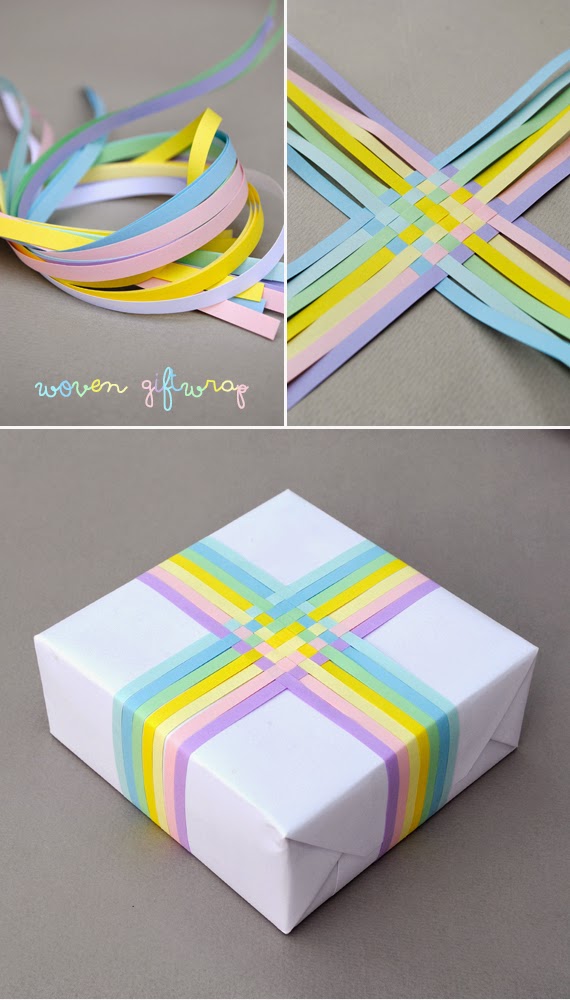
6. Woven Paper Strips. The design of this is so pretty, i would almost not want to open it.
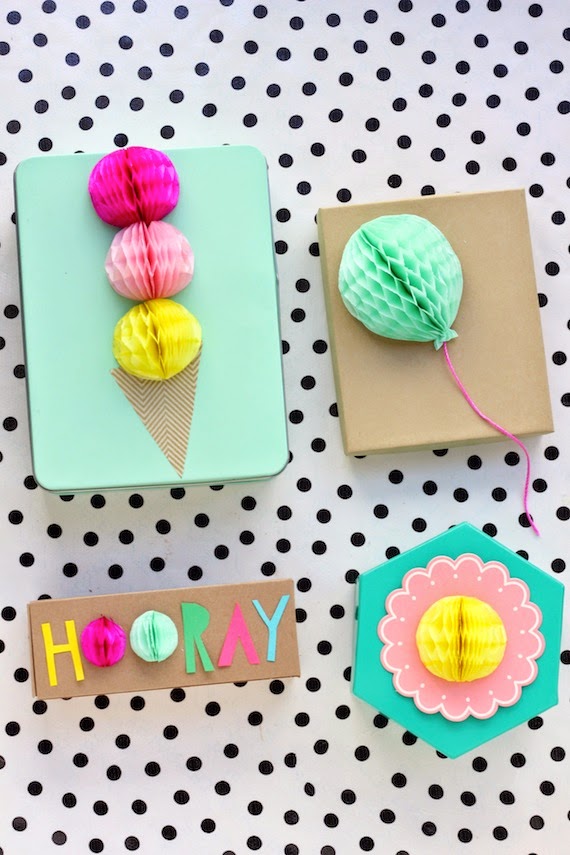
7. Honeycomb Embellishments. You could use these to do snowmen or Christmas ornaments.
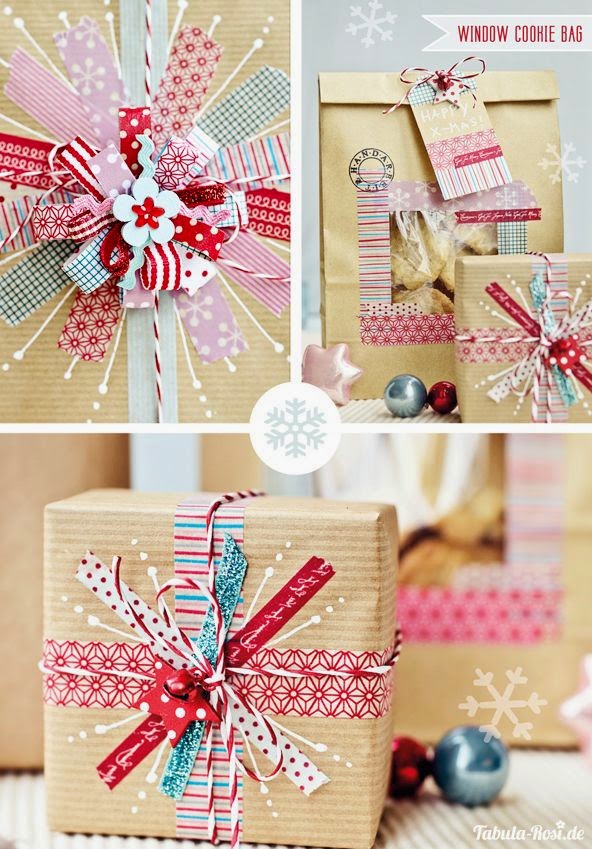
8. Fancy Bow. This is washi tape, white market and ribbon or twine bow. The whole thing looks 3D but only the centre is.

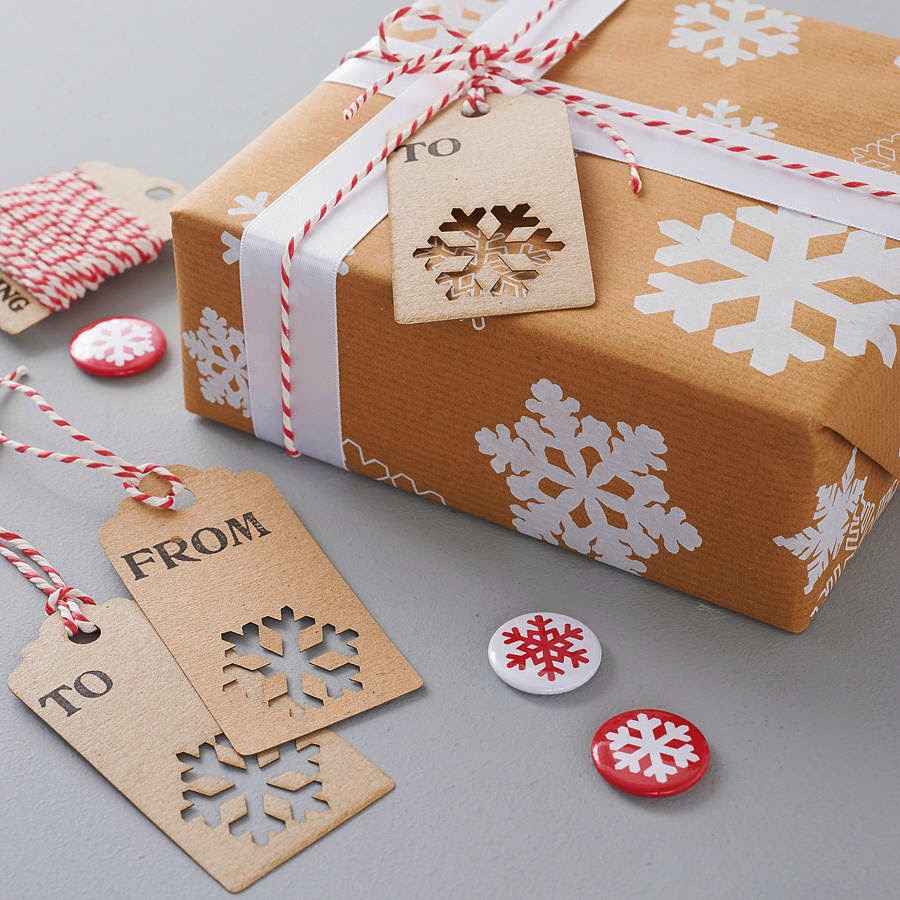
9. Monochrome. I'm personally not into traditional red/green Christmas colours. I think using monochrome with perhaps Christmas tree shaped tag would work well. Great for mens gifts too.
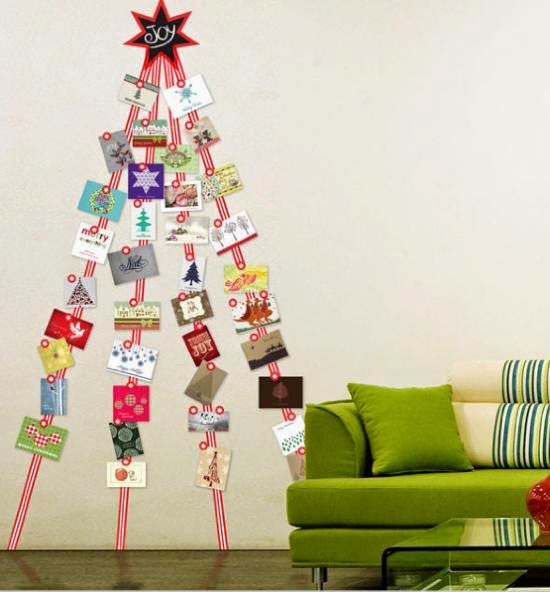
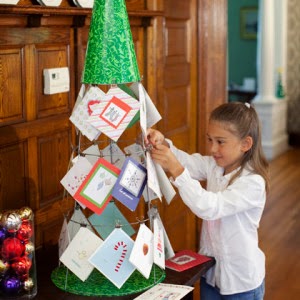
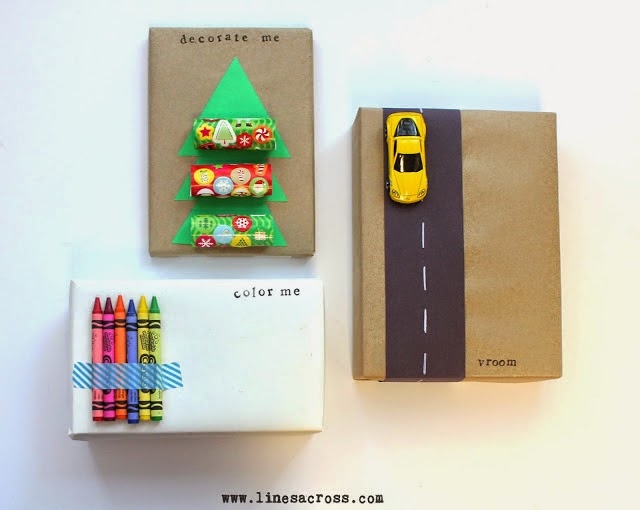
10. Interactive Kids Wrapping. Gift inside a craft. If kids need to wait to open their gifts perhaps during a family lunch then this idea would be perfect. Let them decorate/play with the outside. Decorating a Christmas tree with stickers is a lovely idea.

Here is a gift i sent recently for FMS Gift Exchange. I added a lip balm to the gift tag. It adds little excitement to already be getting a little something before you open the gift.

 I think this is a really clever idea for small items or stocking stuffers. Toilet paper roll decorated with paper, washi tape and/or ribbon. Perfect and easy!

If you'd like help to create some beautifully wrapped gifts then pop over to Paper Cotton Love. You can get these cute little box sets with items such as labels, washi tape, pegs & twine.